Lean-To Shed Build: How to Make a Low-Cost Shed with Simple Materials
Dreaming of extra storage space but dreading the hefty price tag of a pre-built shed? A lean-to shed offers a fantastic solution! This simple structure, leaning against an existing wall, drastically reduces material costs and construction complexity. This guide walks you through building your own low-cost lean-to shed, perfect for storing gardening tools, bicycles, or firewood. You’ll learn how to choose the right materials, prepare the foundation, and erect the frame, all while keeping your wallet happy.
Planning Your Lean-To Shed
Before you grab your tools, careful planning is crucial. First, choose the location carefully. Consider proximity to an existing wall (house, garage, fence) for support, access to utilities if needed (electricity for lighting), and drainage to avoid water pooling around the shed. Next, determine the dimensions. A smaller shed requires less material and effort. Think about what you'll be storing to determine the appropriate size. Draw a simple plan, noting the length, width, and height. Finally, secure the necessary permits. Check with your local authorities to ensure your lean-to meets building codes and regulations before starting construction.
Gathering Materials: Keeping it Budget-Friendly
The beauty of a lean-to shed lies in its simplicity, allowing you to use readily available and affordable materials. For the frame, pressure-treated lumber is ideal for durability and resistance to rot and insects. Opt for readily available sizes like 4x4 posts for the base and 2x4s for the rafters and wall supports. For the roof, you'll need plywood or OSB sheets, and a durable roofing material like asphalt shingles or corrugated metal. Remember to factor in fasteners like screws and nails, as well as waterproof sealant. Consider reclaiming materials when possible â€" salvaged lumber or repurposed roofing can significantly reduce costs.
Material List Example (Adjust to your dimensions):
- Four 4x4 pressure-treated posts (for base)
- Multiple 2x4 pressure-treated boards (for framing)
- Plywood or OSB sheets (for roof sheathing)
- Asphalt shingles or corrugated metal roofing
- Screws, nails, and a level
- Waterproof sealant
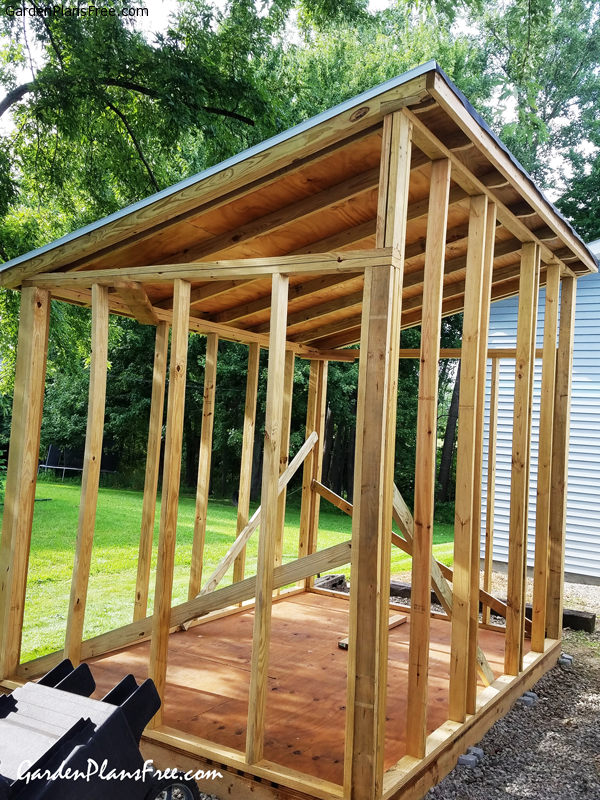
Building Your Lean-To Shed: A Step-by-Step Guide
With your materials gathered and plan in hand, construction begins. First, prepare the foundation. A simple concrete slab or compacted gravel base is sufficient for a lean-to. Ensure it's level. Next, erect the frame. Secure the 4x4 posts to your existing wall and foundation, using concrete anchors or long screws. Construct the supporting frame using 2x4s, creating a sturdy structure. Remember to use a level to ensure everything is plumb and square. Then, install the roofing. Attach plywood or OSB sheets to the rafters, creating a solid base for your roofing material. Finally, apply the roofing material, following the manufacturer’s instructions. Finish by adding a waterproof sealant around any joints to prevent leaks.
Finishing Touches and Maintenance
Once the main structure is complete, you can personalize your lean-to. Consider adding a simple door for better access. You might also paint the exterior for protection and aesthetics. Regular maintenance is key to prolonging the life of your shed. Inspect the structure annually, repairing any damage or replacing weathered materials as needed. Apply a fresh coat of sealant or paint every few years to ensure protection against the elements. Your budget-friendly lean-to shed, built with your own two hands, will now provide years of reliable storage.
0 comments:
Post a Comment